EasyScriber Installation
Installation of the EasyScriber is no more difficult than changing your plasma cutting consumables. Simply unscrew the retaining cap, remove the shield from the retaining cap, remove the torches consumable components, insert the EasyScriber into your retaining cap, and re-install the retaining cap back onto the torch.
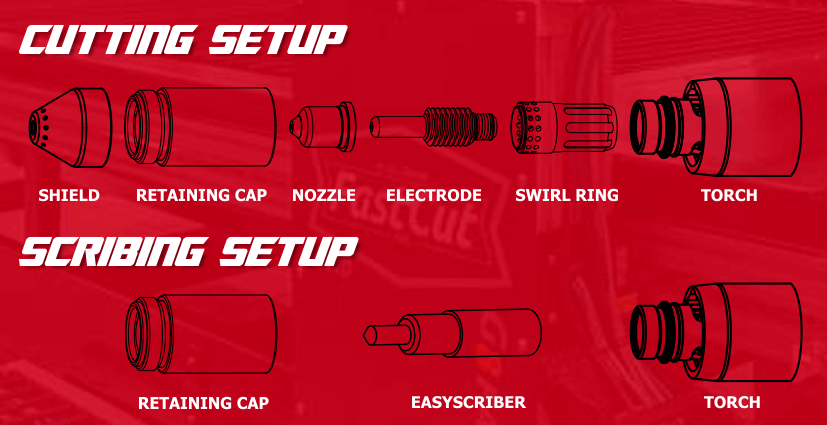
This exploded view of a Hypertherm Duramax torch head illustrates the setups for both plasma cutting and EasyScribing, clearly showing the ease and simplicity of the installation. No matter what plasma cutter and torch you are using the installation remains just as fast and easy.
Tip Compression
The more you compress the EasyScriber's tip in to the body, the more down force it produces, and the more defined your scribe markings will be.
Scribe Speed
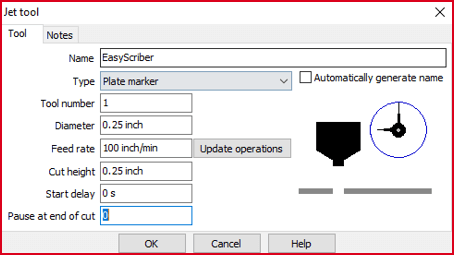
Slower scribe speeds will produce more defined results. 100 ipm is a good starting point and you can experiment with it from there to determine what you like best.
Delay Time
Set your pierce delay time to zero, your scribe does not require any delay once in contact with the material and this will save time.
Rapid Moves
Be sure that you have the scribe lifting up off the material completely before your rapid moves to eliminate "tails" at the end of your scribe lines.
Object Fills
Filling in your designs will add character and definition to your work. This can be done manually in CAD, automatically with add on extensions for CAD, or by using milling tool paths.
Double lines
Doubling up on lines with a small gap between them will also add definition to your work and is easily done in most CAD programs.