SHEETCAM SETUP
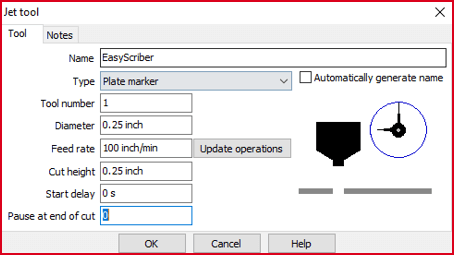
- Start by creating a new Jet Tool for your EasyScriber by clicking Tools> New Jet Cutting Tool
- Enter the Jet Tool settings shown here in your new Jet Tool window. You will select this Jet Tool when using your EasyScriber.
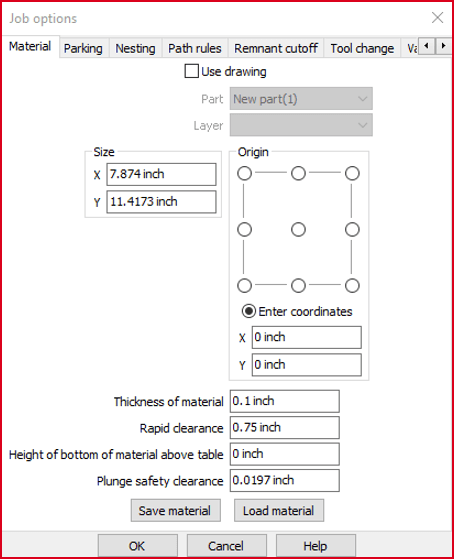
- Set up your Job Options by clicking Options> Job Options
- Set the Rapid Clearance to 0.75 to force the scribe to rise off the material between scribe operations when using your EasyScriber.
PLASMACAM SETUP
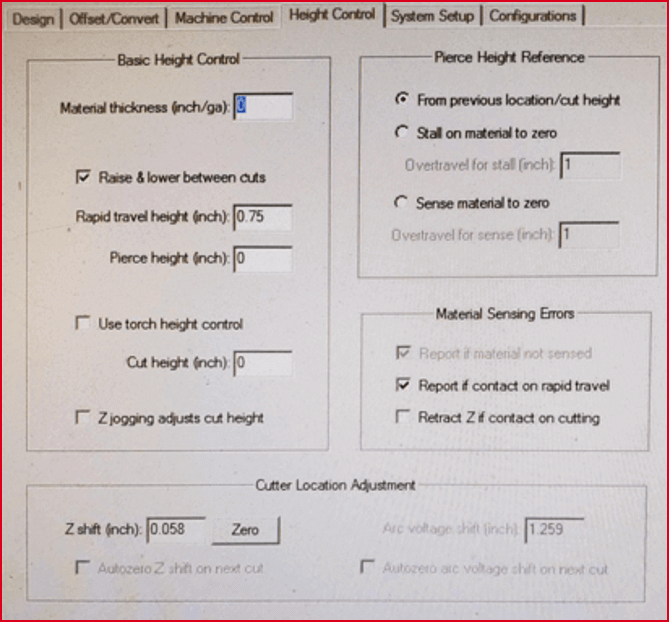
- Open the Settings> Height Control tab. Enter the settings shown in the image into your Settings> Height Control window then close the settings window.
- Install the EasyScriber in your torch, turn the cut control off, jog the torch height down until the EasyScriber tip is compressed 3/16"-1/2", and proceed to the next step. The more you compress the tip the more defined your scribes will be.
- Open Settings> Height Control tab again and click the Zero button located beside the Z shift (inch) entry box in the lower left corner.
TRACKER CNC SETUP
- Open CommandnCut software and click on Edit> Settings to open the settings window shown in the image.
- Enter the settings highlighted in yellow when using your EasyScriber